How to Post on Instagram from Your PC or Mac with Ease
Since its first debut, Instagram has always been a mobile application, and whether you are using an Android phone or iOS phone, you will be able to fully utilize.
A few years ago, and especially after Facebook has acquired Instagram, they have created a website for the application where you can explore everything on the application and even watch videos over it by logging into the website with your own credentials, and that was good, but not enough.
Also Read: How to Save Instagram Photos and Videos on Android
The web-based experience hasn’t allowed you the full mobile phone experience at all, as we all know, Instagram is a place for sharing photos, and many times you would like to post to Instagram from the computer, and that’s cannot be happening in a smooth way.
Best Ways to Post on Instagram from PC and Mac
Before, you could have done that by heading into the inspection mode in Chrome browser and switch the view to a mobile view like iPhone 5/6/7 and you will find the buttons that help you to upload photos to Instagram from PC just like you do from your mobile phone, but unfortunately, seems that Instagram has closed the gate that helped you do that before, and that’s why we had to search for more methods to post to Instagram from PC and Mac.
In this article, I’m going to show you some methods, tips, and tricks to help you share and post to Instagram from the desktop using third-party applications or tools, so keep going down until you find the answer to what you want.
Part 1. Post on Instagram from Your PC
First, we are going to talk about how to post on Instagram from your computer, and this will contain some methods to help you share photos, videos, and stories from your Windows running PC to Instagram.
1. Use Instagram Windows 10 App
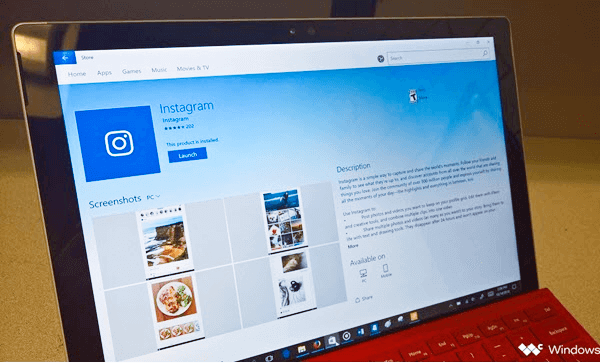
One of the best available ways to post photos on Instagram from your Windows 10 running PC is to download and install the Instagram Modern App from Microsoft Store.
This is an application made by Instagram itself and is available on the store with full compatibility and offers you the full experience of using Instagram after logging in with your data.
You can use Instagram Modern App on Windows 10 to watch stories, videos, and photos, along with the ability to post photos using your PC’s camera and even record a video.
The best thing about the App is that it allows you to do the same as the Android or iOS Apps like sharing your photos to Facebook and Twitter after connecting your accounts, and you can also send a private message to a friend just like the smartphone application.

2. Use the BlueStacks App
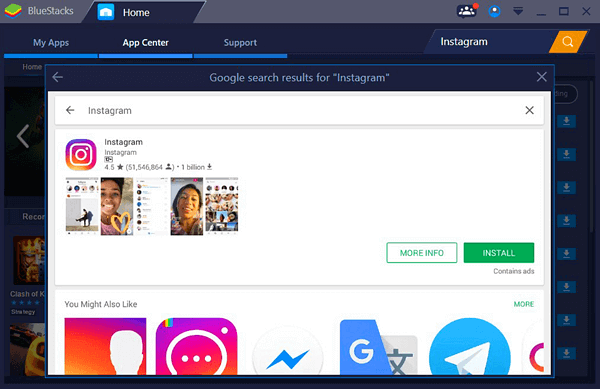
The second way you can upload photos to Instagram from PC is downloading and installing an Android Emulator like BlueStacks.
We have talked before about How to Play Android Games and Run Android Apps on PC or Mac, and this one is the same.
You may find many options to play Android Apps and Games on your Windows PC, but I highly recommend you using BlueStacks.
Although it doesn’t emulate the full Android experience, it does an excellent job in providing you with the Android applications you want on your big screen just by installing any application as you do on your phone.
Also, you can even sync your phone’s Apps without having to download them whenever you want, and it creates a channel between your phone and your PC to sync photos, videos, text messages and more.
With a simple interface, you can use BlueStacks even to play games on your laptop using the touch screen.
You can download and install the Instagram App over BlueStacks whether by downloading the.APK file and install it or to synchronize it from your phone, and once you log in using your credentials, you will be able to get the full experience of using Instagram on your phone on your PC.

Also Read: 12 Best Free Instagram Followers Apps for Android and iPhone
Part 2. Post on Instagram from Mac OS
This one is for those who have got a Mac or any macOS running device, I will show you some methods and Apps that you may use to get the full or semi-full experience of Instagram on your Mac, some of them could be closed soon like the Safari browser method, and others may not, and I will show you how to what you want so you can select the best and the most suitable method for you.
1. Use the Safari browser
Safari browser is the main browser in macOS, and I wish that by the time you are reading this article, the company will not close this cavity like what they have done on Google Chrome.
The working principle here is the same as Google Chrome, all you have to do is to fake Instagram by telling him that you are using a mobile phone and not a PC browser to get the option to upload and post on Instagram from your Mac.
All you have to do is to open the Safari browser, then head into the Preferences by clicking on it or by using the shortcut Cmd + Comma.
Then, move to the Advanced tab, and you will find an option says Show Develop Menu in Menu bar, check that box and move to the next step.
After checking the previous box, open Instagram.com and you will find a new Develop tap on the menu bar, click on it and select User Agent, then select Safari – iOS 11.0 – iPhone.
Once you complete the previous step, you will find the page is refreshing and you will get a mobile experience-like of Instagram with the bottom buttons like Upload and Home and the others so you can use them to upload photos and videos and even add some filters and effects to optimize your pictures.

2. Use the Vivaldi browser
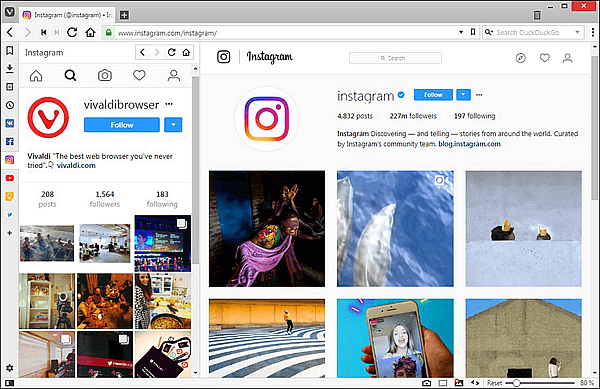
The second method to upload and post on Instagram from Mac is using Vivaldi, a super-customizable browser that offers some of the best ways to post to Instagram from Mac, simply by running the phone’s version of Instagram instantly with a simple technique even more straightforward than Safari.
All you have to do after downloading and installing the Vivaldi browser is to head to Instagram.com and then to click on the (+) icon which refers to (Add Web Panel).
Once you click on it, you will find that the URL is filled automatically, and now you will be able then to upload photos to Instagram from Mac using the browser and even adding filters and editing your photos.

Tip: Need to download Instagram videos to your phone or computer? Here are some best free Instagram video downloaders that can help you save Instagram videos easily.
3. Use the Flume App
Flume is a standalone application available only for Mac devices, and its only mission is to provide you with a mobile-like Instagram experience on your Mac.
The best thing about Flume is that it provides you with a stylish window that contains your Instagram feed, buttons, stories, and more. You can use the bottom buttons to post on Instagram from your Mac, and you can even like, comment and share the photos you want by clicking on it.
Flume also provides you with your recent notifications, and it offers some recommendations just like the original mobile App.
The downside of Flume is that it’s free, but with a limited number of uploads, so you will have to upgrade it to premium if you are planning to use it for a long time.

Conclusion
In the previous lines, I have shown you some of the best methods to post on Instagram from your PC or Mac by using third party Apps and emulators.
You might don’t need to post from your PC or Mac for a long time, but sometimes you may have no other choice, and that’s why I wrote this article for you.
Also Read: 5 Best No Crop Apps for Instagram to Post Full-Size Pics
Don’t hesitate to share this article with your family and friends so you all can be on Instagram all the time and via any type of device, and show us your thoughts in the comments section below.
Pro Tip – Recover all your data with a click
If you have ever lost your data due to any reason whether by a fault or by factory resetting your phone to get back the access to it, I recommend you using Gihosoft Free Android Data Recovery software which will help you to recover any type of data without any effort.
Images, videos, text messages, call logs, contacts, WhatsApp Messages and more are recoverable when you use Gihosoft’s Free Android Data Recovery Software, and you will not have to root your device to be able to do so.

