Partition Recovery: How to Recover Files from Lost/Deleted Partition
Lost Partition Data Recovery Is Possible
Partition loss is usually caused by faulty operation (such as the wrong Ghost), software conflict, power failure, hot plug failure, etc. If you use some tool to delete a partition on your hard disk, the partition disappears into a free space. Can the data in the partition be restored? The experiment proves that it is hopeful to perform partition recovery as long as the partition is not established or written in large amount. Because the redeveloped partition will be formatted to add to the problem of data recovery.
RePicvid Free Photo Recovery could be used to recover files (photos, videos and audio files) due to partition loss on internal/external hard drive, SSD, USB flash drive, SD/memory card, etc. In addition, it also supports data recovery lost for RAW partition, formatting, virus attack and other reasons.
Procedure to Recover Files from Deleted/Lost/Missing Partition
First search RePicvid Free Photo Recovery to download and install. It offers different versions for Windows and Mac users. Then follow the steps below to conduct partition data recovery.
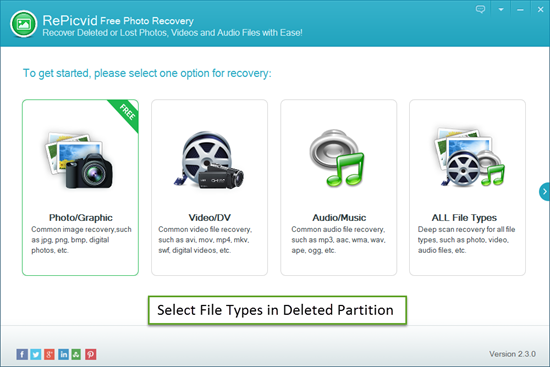
1. Select File Types in Deleted Partition
Open the installed software. Select the following options based on the situation you are facing. If you lost photos in the deleted partition, choose the “Photo/Graphic” item.

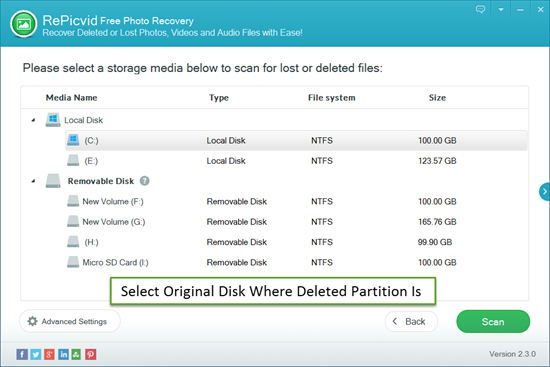
2. Select Original Disk Where Deleted Partition Is
To select your deleted partition as target location, it is suggested to select the original disk that contains the deleted/lost partition. Click “Scan”, then the software will search for the files in the hard disk.

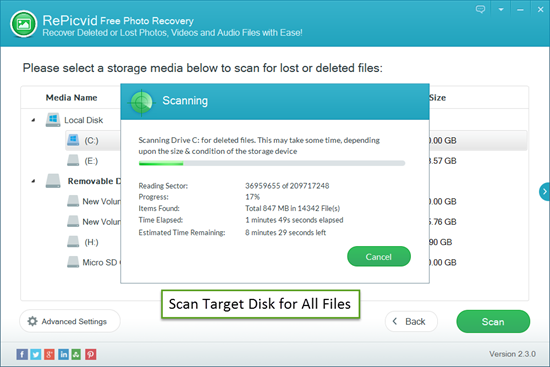
3. Scan Target Disk for All Lost/Deleted Files
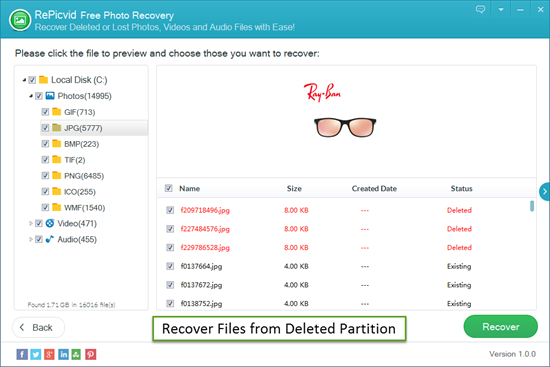
When the scan completes, it lists the files that are detected. The font red is the lost files, the font black is the current existing files. Preview and choose the missing files to recover.

4. Recover Files from Deleted Partition
Click “Recover” to select the path to save them. Note that the file must be saved onto another disk or a portable hard disk. After the partition recovery finishes, you can check the successfully retrieved files, and then create a new partition of the original disk to copy back the restored data.

How to Create New Disk Partition
- Open the control panel and select the “big icon” in the upper-left view.
- In all projects, find “Management Tools” and click to open.
- In turn, find “Computer Management”> “Storage”> “Disk Management”.
- Click on disk management to see all disk partitions in the right window. On one of the disks that you want to change, right-click on the compression volume.
- After the system is automatically queried, you can change the size of the desired disk in a new “Compression” window.
- Once you have entered your compressed space, click “Compress” to see that the original disk has become two partitions, and the size is changed according to your requirements.
- Finally, on the newly released partition, right click “Create a simple volume”. And then click next step all the time, you can see the extra partitions in the computer.
