How to Recover Deleted Photos & Files without Software but CMD
When you arrive here, you may have already done quite a lot searching and trying but with no luck retrieving your lost photos or files, or some recovery tools give you hope but ask for payment at the last step. No worries. In this tutorial, you will find two 100% free solutions to undelete photos from SD card, digital camera, external hard drive, etc. You can either use CMD trick, or a 100% free photo recovery software.

We know that you’re willing to try anything to get back your pictures along with the precious memory, but you don’t have to break your bank by applying methods provided in this tutorial. Just follow the instructions below and restore your deleted or lost photos free and easily.
- Method 1. Recover Deleted Photos without Software by Using CMD
- Method 2. Recover Deleted Photos with 100% Free Software on Windows/Mac
Method 1. Recover Deleted Photos without Software by Using CMD
CMD, also known as Command Prompt, is a command-line utility that can do a lot of things for Windows users, like fixing SD card not formatting error or repairing corrupted pen drive. As a matter of fact, it is also possible to recover permanently deleted files using CMD so that you don’t have to use a paid software.
Note: It could cause data overwriting when applying CMD recovery on a disk drive. If you insist on using CMD for a recovery, the best method is to clone your drive at first, and then you have a backup plan instead of having the data destroyed by CMD directly without another choice. Alternatively, you may skip to Method 2 and try the free photo recovery software.
Ready to recover deleted photos using CMD? Just follow the steps below. If you want to recover photos from a removable drive, like an SD card, USB flash stick or external hard drive, please connect it to your computer.
- Step 1. Click Start menu, type Command Prompt, right click on it from the result and choose Run as administrator.
- Step 2. On Command Prompt window, type chkdsk H: /f and hit Enter. (Replace “H” with the drive letter of the drive that your files were deleted from)
- Step 3. Type Y and hit Enter to confirm and start examining.
- Step 4. Type H (replace it with your drive’s letter) again and hit Enter.
- Step 5. Type attrib -h -r -s /s /d H:\*.* and hit Enter. Wait until the command to take effect and restore your deleted files.
What do the attributes mean?
- –h assigns the ‘Hidden’ attribute to the selected files
- –r is read-only attribute: Files are readable and cannot be changed
- –s assigns ‘System’ attribute to the selected files
- /s means to search the specified path including subfolders
- /d command includes process folders
- H (or another letter) is the letter of your drive
Though we can try restoring lost photos using CMD, whether deleted or hidden, it may not work on all occasions. In case the above steps fail to get back your lost pictures, you may skip to another solution.
The main concern for most users to choose to recover photos without using any software is that third-party recovery tools usually charge people a lot. However, what if the software is 100% free for photo recovery?
Method 2. Recover Deleted Photos with 100% Free Software on Windows/Mac
Gihosoft RePicvid is a free photo recovery software, which is able to recover deleted or lost photos from SD card, USB flash stick, external hard drive, PC, etc. Besides common photos, such as JPEG, PNG, GIF, RePicvid also supports the recovery of digital camera RAW pictures, including SR2, CR2, RAF, ARW, etc. If you want to recover permanently lost image files without using any paid software, RePicvid is your best choice.
There are three editions of RePicvid available for users. If you want to recover lost PDF, Office document, video and more files in addition to free photo recovery, RePicvid Standard will suit your need perfectly.
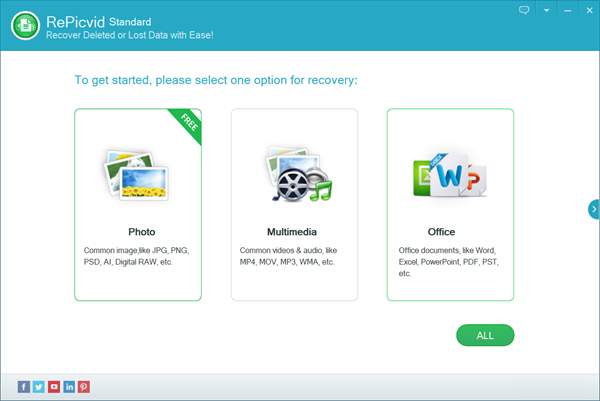
- Step 1. Run RePicvid Standard on your PC, then choose Photo.

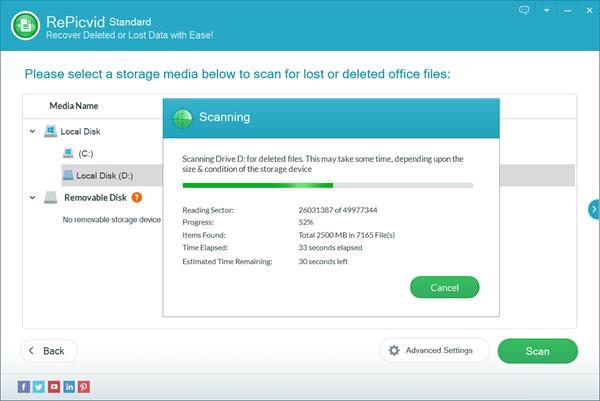
- Step 2. Select the partition that you want to recover photos from, then click Scan.

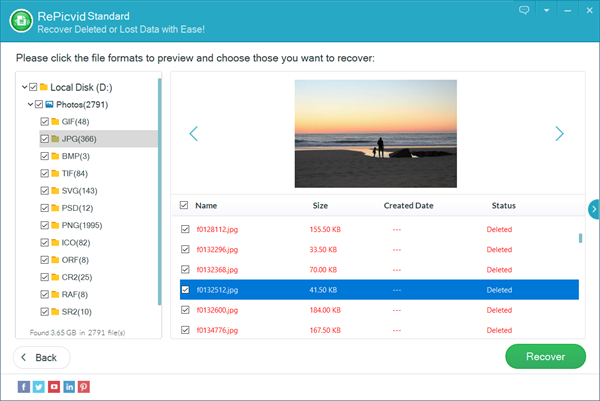
- Step 3. Preview the found data, then select those you need and click the Recover button.

You’ll be required to select a location to save the files to be recovered. Just make sure not to save them to the original disk drive to avoid recovery failure and permanent data loss. Once the photo recovery is finished, you’ll be guided to the output folder where you can check and move the recovered photos.
Conclusion
No matter which method you choose in this tutorial, it will be 100% free to recover deleted photos without a software or with a freeware, so there is no need to worry wasting money. Nevertheless, the free recovery software, RePicvid, is highly recommended for its high recovery rate and user-friendly operation. If you have any questions, just let us know in the comment.
