5 Ways to Transfer Files from iPhone to Mac without iTunes
Sometimes we meet the situation of transferring our files from iPhone to Mac, for instance, your device shouts ‘Storage almost full’ for it has stored so many media files that you need to move some of them to your Mac. Luckily for iOS users, it is much easier to transfer files from iPhone to Mac than to Windows PC, and can doing it without iTunes which though is totally capable of this task. There are several alternative techniques and methods available to transfer iPhone files to Mac without iTunes, and some of the best ways are introduced in this article for your convenience.
Bonus Tips: If you lost any important data, you can always use Gihosoft iPhone Data Recovery to get them back from your iOS device or iTunes backup; besides, it can also be able to copy your messages, contact, notes, call history, media files, voice memos and much more from your iPhone to your Win/Mac PC.
- Method 1: AirDrop Files from iPhone to Mac
- Method 2: Transfer iPhone Files to Mac with iCloud
- Method 3: Transfer Media from iPhone to Mac using Photo App
- Method 4: Using Preview App to Copy iPhone Files on Mac
- Method 5: Email iPhone Files to Mac
Method 1: AirDrop Files from iPhone to Mac
The best and easiest way to transfer files from iPhone to Mac without iTunes is to make use of AirDrop. Similary to Bluetooth among Android devices and Windows PC, AirDrop can easily send your files between iPhone and Mac without network connection, as long as your two devices is placed close enough. You will be able to transfer files wirelessly between two devices. Follow the steps below to copy iPhone file to Mac via AirDrop.
- Step 1: Activate AirDrop on your Mac at Finder > Go > Airdrop, as well as enable Wi-Fi and Bluetooth (but your don’t need to connect to any network; just swtich the two buttons on).
- Step 2: Enable AirDrop on your iPhone by tapping Control Center > AirDrop along with the WiFi and Bluetooth buttons. You can choose to be discovered either by Contacts Only or Everyone.

- Step 3: Open the to-be-sent file on your iPhone, then tap on the Share button and soon your Mac icon will appear as a share option. Click on the Mac icon to start the transfer process.
- Step 4: Click on “Accept” on the pop-up window on your Mac, and wait till the process finished.
You can proceed to transfer images, videos and other content from iPhone to Mac by this method quickly and easily. And this can also applied to the file transferring between all Apple products like Mac to Mac or iPhone to iPhone/iPad.
Method 2: Transfer iPhone Files to Mac via iCloud
With Apple iCloud, especially the iCloud Drive since iOS 11, you can copy files from your iPhone to Mac easily.
- Firstly, it’s better to update your Mac to the latest version of Mac OS.
- Login to the iCloud using the same Apple ID on iPhone and Mac.
- Make sure you have activated iCloud Drive in Settings > Apple ID > iCloud.
- Also enable iCloud Drive on your Mac. You will find the option inside the Apple Menu.
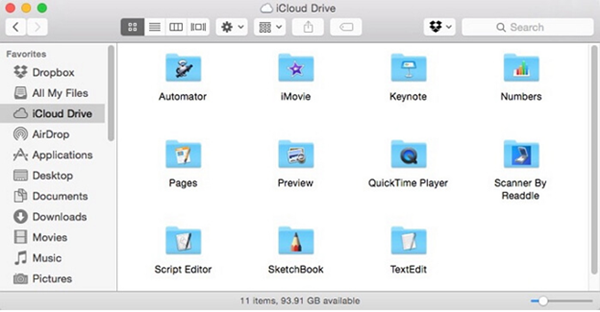
- After the competition of the above process, you just need to save your files to the Files app on iPhone and then you can access all your iPhone files via iCloud. You can locate the files in Finder > Documents folder under iCloud.
For photos and videos stored in iCloud Photo Library, you just need to turn on ‘Upload to My Photo Stream’ on iPhone and ‘Download and Keep Originals’ on Mac, then those media files will be automatically saved to your Mac.
Method 3: Transfer Media from iPhone to Mac using iPhoto App
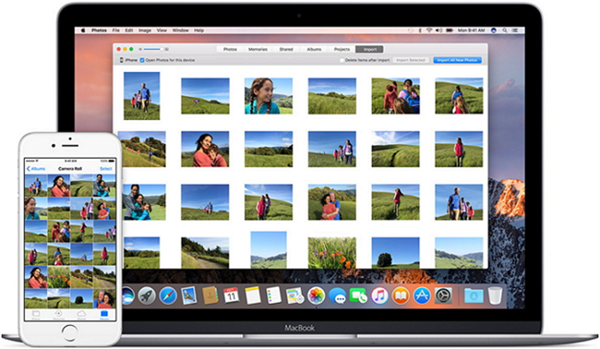
It is possible to transfer files from your iPhone to Mac via iPhoto App. This is another useful ways to transfer photos or videos from iPhone to your Mac without iTunes. The main highlight of the Photo App is that it’s easy to use and the process can be completed within few steps.
- Connect your iPhone to Mac via USB and open iPhoto app.
- You will be able to view the media files inside your iPhone after opening the iPhoto app. Select the file you need to transfer and select Import Selected option. It is also possible to move the media files by copy and paste operation.
Method 4: Using Preview App to Copy iPhone Files on Mac
You can also make use of the Preview App to transfer files from your iPhone to Mac without iTunes.
- Step 1: Establish connectivity between your iPhone and your PC via a USB cable
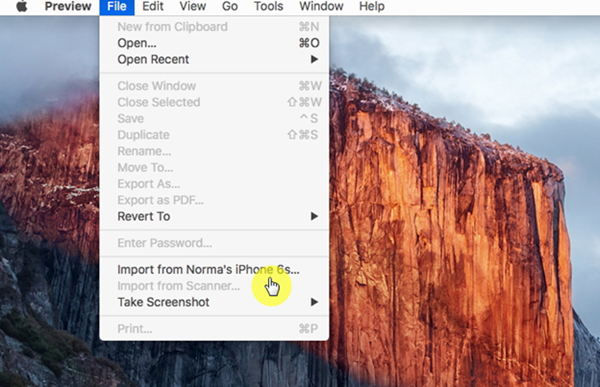
- Step 2: Navigate to Applications and open the Preview app.
- Step 3: Navigate to File on menu bar and select ‘Import from [your iPhone name]’ option after launching the Preview app.
- Step 4: The system will display a list of all the files. You can either drag and drop the files or make use of the Open tab to pick a location.
Method 5: Email iPhone Files to Mac
The most traditional yet still useful way to transfer files is by Email. If you would like to transfer less than 20 to 25 images from your iPhone, you can use Email to deliver files to Mac. However, delivery of videos will be a problem due to the size of the file. The Email route will be ideal if the size of the file is less than 50MB, especially if you want to send files from iPhone to other Mac remotely. You just need to launch the Mail app on iPhone, type in the receiver’s email address and attach all the relevant files and click Send. Then you files can be access on any device including Mac as long as it can access the receiver’s mailbox.The only point to note is that you should maintain a reliable Wi-Fi connectivity on iPhone to transfer the files smoothly.
Conclusion
Above all are the good ways to transfer your files from iPhone to Mac without iTunes if you are an iPhone user. In addition, you can send images and videos from some social media or messaging tools like WhatsApp from your iPhone to Mac without iTunes, though it’s inconvenient for bulk transferring. Are you using any other good method? Welcome to share with us in the comments.
Also read:
- 4 Easy Ways to Transfer Photos from iPhone to Computer
- How to Send Large/Long Videos from iPhone to Other People