Excel Encryption: How to Password Protect Excel Files?
Nowadays, for modern people, the Excel has become an indispensable tool for their work because of its convenience and usefulness. Of course, not only that, in daily life, people need to use Excel files to record both life and business matters, such as daily expenses, passwords for various accounts especially bank account and plans to be completed during a certain period of time. In your Excel files, there are not only some important data of work but also the privacy of your personal life. So, you have to prevent these significant files from leaking out. In this case, encrypting Excel files is particularly important!
In fact, Excel itself also provides you with a basic file protecting service, and that is to grant read-only access to the worksheet so as to prevent it from malicious tampering or accidental deletion. However, these primary file protection features of Excel stated above may not be able to meet your needs. So, next we will provide you with several ways to encrypt Excel files with password, including using Excel’s built-in password protecting function, and using an encryption software to lock Excel files.
Method 1. How to Password Protect an Excel File with Excel’s Built-In function?
Warning: Microsoft cannot restore forgotten passwords, so make sure that your password is not easy to forget! Additionally, there are no restrictions on the passwords you use for Excel encryption with regards to length, characters or numbers, but passwords are case-sensitive.
The specific steps for Excel encryption are as follows:
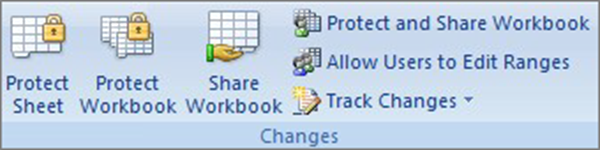
- In Excel 2007, first go to the Review tab and then click on Protect Sheet or Protect Workbook.
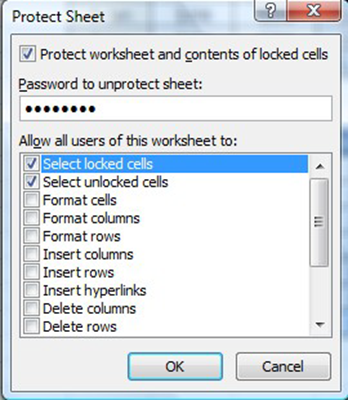
- When a pop-up window appears, select your options and type in the desired password. Your password should be something random that no one would ever suspect.
- Next, click on File, then Save As. When the file-save window appears, type in your file name, then select the Tools drop-down menu. From that menu, select General Options.
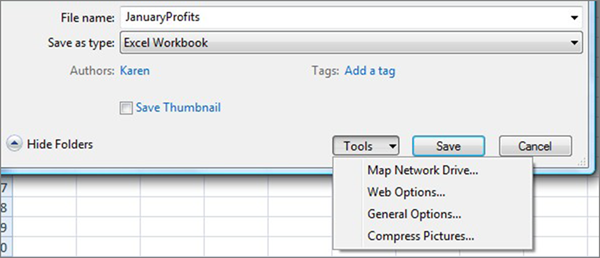
This will enable you to password protect the entire workbook. At this point, you have two layers of Excel encryption with password: one at the sheet level and one at the workbook level.
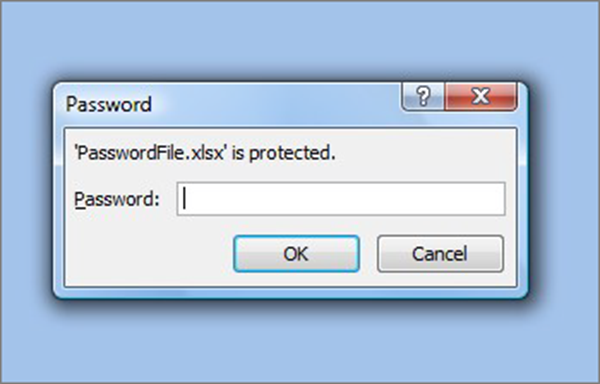
Now, whenever you want to open that encrypted Excel file, you will first see a screen like the one below asking for your password.
Well, although encrypting an Excel file with a password by Excel’s built-in features can prevent others from tampering with your data. However, we still don’t recommend storing your sensitive data in an Excel spreadsheet because it uses a very weak encryption system. But if you do need to do so, you can realize Excel encryption turning to an file encryption software with higher security.
Method 2. How to Lock Excel File with an Excel Encryption Software?
Here we recommend you Gihosoft File Encryption which makes it easier and safer for you to protect Excel files on your computer. This Excel encryption software helps you lock Excel files as well as other files on PC with a personalized password, particularly some files/folders containing sensitive and important data, preventing them from leaking. With this easy-to-use file encryption software, you are able to lock your files and folders with only a few simple steps. Besides Excel files, other popular files are supported, for instance, Word, PowerPoint, OneNote, Sway, Mail, pictures, videos, etc.
Tips:
- Whenever you run this File Encryption program, you have to enter your master password in order to unlock the program to start encrypting.
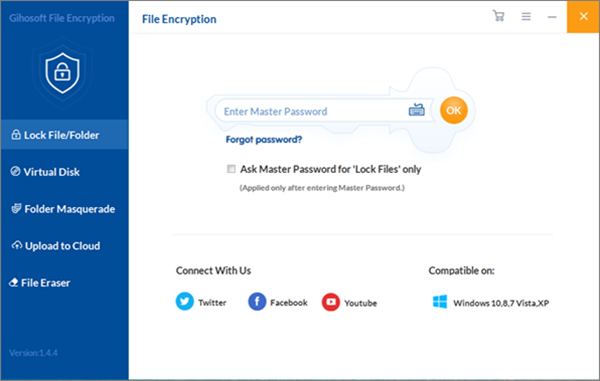
- And what you should know is that the trial version enables you to try locking 3 files for free, so you can try it first before upgrading it to the pro version to explore more features.
The specific steps to encrypt Excel with password are as follows:
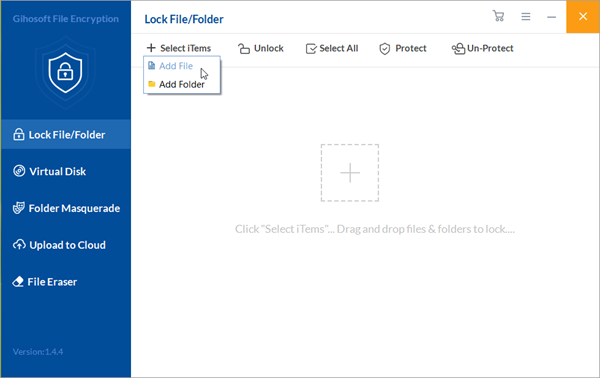
- On the left panel of the home page, you can see Lock File/Folder option and click on it. Then click on Select Items on the toolbar above, and you will see a box with two options – Add File and Add Folder. To encrypt Excel files, you just need to click on Add File or directly drag and drop your wanted Excel file to get it locked.
- Now you can see that the Excel file you want to encrypt is listed under the “Items” list in the program interface, and at the same time this file will disappear from its original location. This means that no body can see or access this file except you.
- If you want to decrypt the Excel file for any use, then you should click on the Un-Protect button (the small lock icon beside the file will then change to the unlocked icon) to decrypt it and restore it back to its original location. Whenever you want to encrypt it again, just come back to this encryption program, choose the file from the list and click the Protect button.
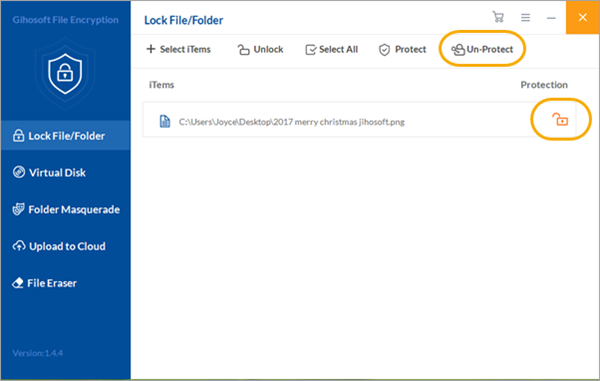
- If you don’t need to encrypt this Excel file any more and also want to remove it from the “Items” list of the program, just choose the file from the list and click the Unlock button.
Conclusion:
The above are the two methods for how to password protect an Excel file. Why don’t you download it and have a try quickly? If you have any question during the operation, you can refer to the Gihosoft File Encryption user guide we have previously prepared for you. Welcome to leave your message in the comment area below!