How to Encrypt Photo Files Before You Upload Them to Cloud?
For your most cherished photos or pictures, you may choose to keep them private separately on your computer and don’t let other people get access to them except your closest person. But considering the limited space of your PC drive, you’d better upload them to the cloud. In addition, the cloud storage for photos also makes it more convenient for you to access and download photos as long as there is a network. However, for the safety of them, you need to encrypt these photo files before uploading to the cloud. Next, we will share with you the two main methods about how to encrypt photos for cloud storage!
Method 1 – How to Encrypt Photos Before Uploading to Cloud with Best Photo Locker?
As one of the best image encryption software, Gihosoft File Encryption is dedicated to providing the most professional photo encryption for users. With the lite and clean graphic user interface, you can easily find the corresponding function you need. It adopts password to protect your photo files. Now, come with me to know the detailed steps on how to get photos encrypted!
1. Run Gihosoft File Encryption program on your computer. Then just enter a master password according to the prompt and you will get into the main interface. On the left side of this page list the main 5 functions while at the top of it list the corresponding options. Click on the second function named as Virtual Disk, and click the first option called Create. Then you need to set the name and location of this virtual disk you want to create.

Attention! The trial version can only create a virtual disk with a max space of 1300 MB. So if you need to create a bigger disk encrypting image files, you can upgrade this program to its pro version.
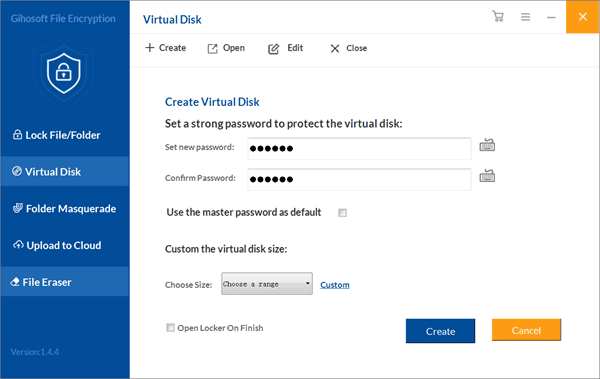
2. After you click Next, you can see an interface on which you can set a new password to protect this disk and custom the size of it. When you finish, then click Create.
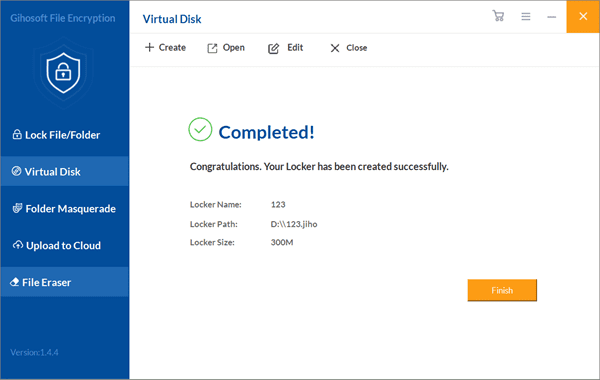
3. Now you can see the a disk pop up with a prompt noting that you have completed the process. Click Finish. Afterwards, you can rename, copy, move, delete and remove this virtual disk according to your needs.
4. Put your photo files into this virtual disk. Then upload this encrypted disk containing photos to the cloud storage such as Google Drive, Dropbox, etc. Others won’t have the permission to see the images in this disk without your password and this software.
Method 2 – How to Get Photos Encrypted Before Uploading to Cloud with BitLocker?
Here is an alternative method for you to encrypt photos for cloud storage! BitLocker is an encryption feature included with Microsoft Windows versions, and it’s designed to protect data by providing encryption for entire volumes. The steps about how to encrypt photos for the cloud storage are stated as follows:
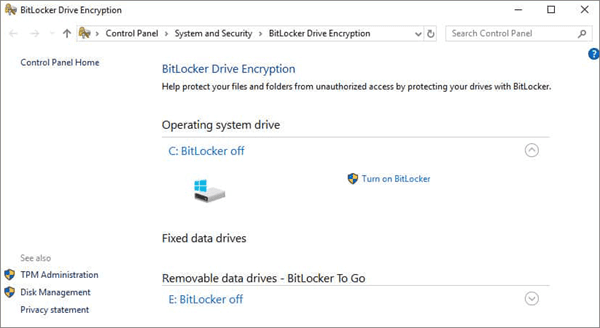
1. To set up BitLocker. Go to the Control Panel to find System and Security. Click System and Security and then click BitLocker Drive Encryption. And click on the Turn on BitLocker option under BitLocker Drive Encryption.
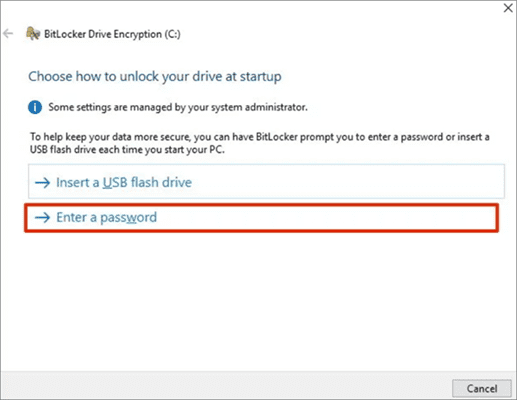
2. Now you can see two options – Enter a password and Insert a USB flash drive. If you have set up a USB drive to unlock your drive, then you can choose the Enter a password option here. We use the Enter a password as an example. Enter a password and confirm it. Then click Next.
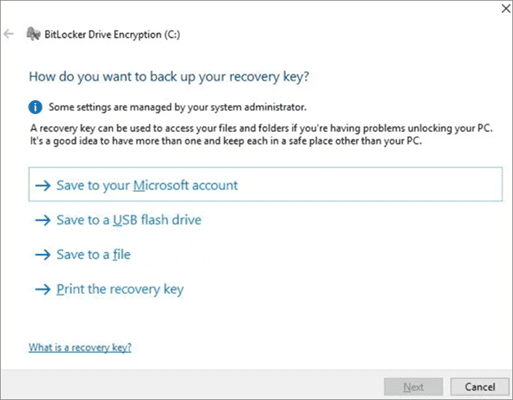
3. Now you will need to choose one from these 4 options shown in the picture below to save a recovery key which can help you regain access to your encrypted photos in case you forget the password. And then click Next.
4. You need to choose Encrypt used disk space only or Encrypt entire drive depending on your particular needs and then click Next.
5. Select one option from New encryption mode and Compatible mode. Click Next then.
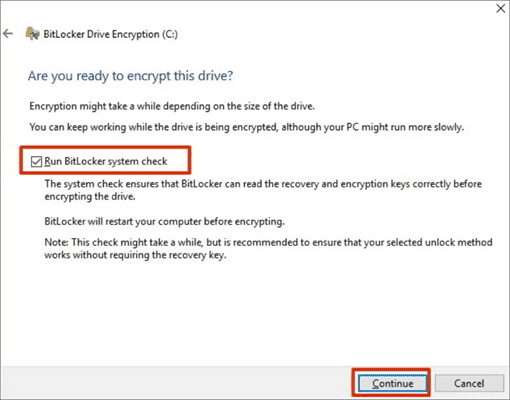
6. You should check Run BitLocker system check, and that will make sure the normal operation of the recovery and encryption keys. Click Continue.
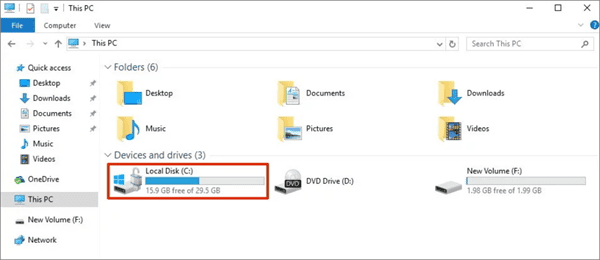
7. Finally, you should check out whether BitLocker is turned on or not. Just go to My PC and see if there is a Lock icon next to the drive.
8. To open this photo locker, you can click This PC and then right-click the encrypted drive to choose Manage BitLocker. You can suspend BitLocker or completely disable it.
9. When you finish this encryption process above, you can upload this drive to cloud, which is similar to step 4 in the first method.
Conclusion:
If you feel these two methods practical, you can share them with your family and friends for their convenience. In addition, if you need to encrypt an Excel file, encrypt a Zip file, and encrypt a PDF file, you can also use it to help you!