How to Take a Screenshot on Samsung Galaxy S10/S9/S8/S7 with Ease
After years of development, Samsung has introduced a number of ways to capture screenshots of your phone screen and share it with your friends via Bluetooth sharing or other applications such as Messenger, WhatsApp, Google Drive or any other sharing application.
Here, we will introduce how to take a screenshot on different Samsung phones. Whether you’re using the Samsung Galaxy S7, S7 Edge, S8, S8 Edge, S9, S9 +, S10, S10e or Galaxy S10 Plus, you’ll find the right solution for you.
Part 1. The Benefits to Take a Screen of Your Phone Screen
Many times, you may want to share a web page you are browsing with friends, interesting Facebook posts, private chat messages, important addresses, or anything else you see on the screen, which can be done with screenshots. In addition, once you’ve learned how to make a screenshot, you can use this feature to report problems to your company or application developer to better explain the problem you are facing. So, the screenshot function is very convenient, making our life easier.
Next, let’s move on to the important part of this article, where I will show you how to do a screenshot on Samsung Galaxy S10, S9, S8, S7 and other mobile phones with ease.
Part 2. How to Take a Screenshot on Samsung Galaxy S7
Along with the launch of Samsung Galaxy S7, Samsung has introduced three different ways to create a screenshot of Samsung Galaxy S7. None of these methods requires any Apps, as they are all built-in in the system itself.
1. Take a screenshot by buttons shortcut
The most and the first method to make a screenshot on Samsung Galaxy S7 is by using the buttons shortcut, which is the most common way to take a screenshot on almost any Android phone made by any manufacturer.
Here are the specific steps for the Samsung Galaxy S7 screenshot:
First, make sure that the application you want to take a screenshot of is on the screen, Then, hold down the power button and hold down the home key that you can find below the screen, and that’s it, your screenshot is saved on your device.
After taking the screenshot, the phone will provide you with some options to edit and modify it, with these options, you can share, crop, add some stickers on your picture.
If you want to just save the screenshot, click on any point of the screen and it will be saved.
If you want to find your photo you can head into the gallery or open the file manager and go to DCIM/screenshots, and there you will find all your saved screenshots to modify, delete, or share them.

2. Take a screenshot by Palm Swipe
The most significant feature of all Samsung Galaxy phones is the Palm Swipe, the feature that allows you to make a screenshot on Samsung by moving your hand over the screen of your phone.
All you have to do is to move your hand over the screen of the phone, and a screenshot will be taken and saved into your storage instantly.
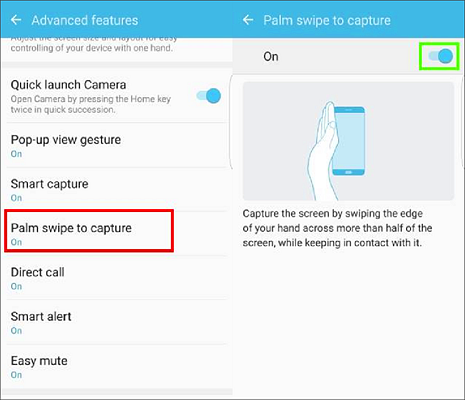
If you tried to take a screenshot using the Palm swipe feature and you couldn’t, you may have this feature disabled so you will need to enable the Palm Swipe from the Settings on the phone.
In order to enable it on your phone, all you have to do is to head into your phone’s Settings, click on Motion and Gestures, then enable Palm Swipe to Capture by opening it and switching it ON.
Part 3. How to Take a Scrolling Screenshot on Samsung
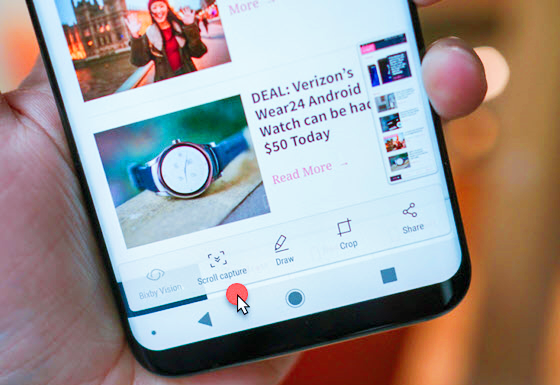
If you want to take a screenshot on multiple windows together, Samsung hasn’t left you alone, as it has provided you with scrolling screenshot, a feature that helps you taking a screenshot on windows at once.
Only have to perform this option is to take a screenshot by using one of the previous in explained methods, click on Capture More, and then scroll down to take multiple screenshots on the same picture.
Tips: Need to connect your phone to the computer but encountered a “Device is not recognized”error? Download and install the latest Samsung USB Drivers on your PC now!
Part 4. How to Take a Screenshot on Samsung Galaxy S8
Samsung Galaxy hasn’t introduced any more features on Samsung Galaxy S8 as it has the same ways to take a screenshot like Samsung Galaxy S7.
Three ways to make a screenshot on Samsung Galaxy S8 are the same as the previous one; The first method is to take a screenshot by clicking on the power and the volume down buttons, and your screenshot will be taken immediately.
The second method the is using the Palm Swipe, all you have to do is to move your hand over the screen of your phone and the screenshot will be taken instantly.
Note: You may also need to check the swipe to capture feature easy swipe feature didn’t work with you for the first time.
And finally comes which is the scrolling screenshot, and here you can easily take a screenshot by clicking on Capture More after taking your screenshot, and then scroll down until you get your desired screenshot.
Part 5. How to Take a Screenshot on Samsung Galaxy S9
Along with the previously introduced ways to make a screenshot on Samsung Galaxy phones, Samsung Galaxy S9 has provided us with more ways to take a screenshot, that’s by using artificial intelligence.
Buttons Shortcuts, Palm Swipe, and the scrolling screenshots are included in Samsung Galaxy S9 and S9+. The difference here is adding some artificial intelligence-based methods to take a screenshot on Samsung Galaxy S9.
Note: On Samsung Galaxy S9, to enable the Palm Swipe to capture feature, you have to go to Settings > advanced features, and then check the Palm Swipe to capture option.
On Samsung Galaxy S9 and S10, and after Samsung has removed the Home button, now you have to tap and hold the Power button along with the volume down button to take a screenshot.
1. Use the assistant menu to take a screenshot on Galaxy S9
Samsung Galaxy has copied this feature from Apple’s iPhones. This feature allows you to do many things by tapping on a button found on the right side of the screen, and it contains many options including taking a screenshot.
You can enable the Assistant Menu by following these steps:
- First: Head into the Settings, and then click on Accessibility.
- Second: From Accessibility, click on Dexterity and interaction.
- Third: From the new menu, click on Assistant Menu, and finally toggle the button to turn on Assistant Menu feature on Galaxy S9.
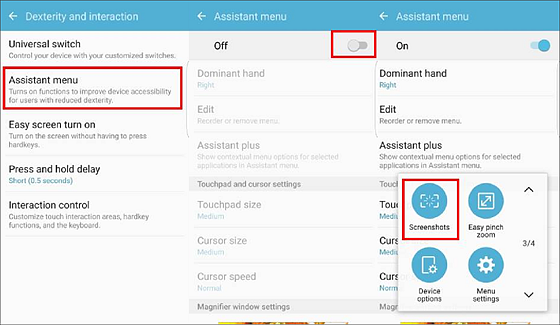
Now, whatever the application you are using, you can click on the Assistant Menu on the right side of your screen and click on Screenshots to take an instant screenshot for the window you are using.
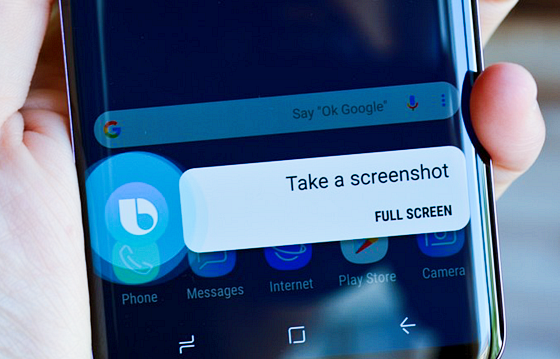
2. Use Bixby voice commands to take a screenshot on Galaxy S9
If you are one of the few who likes Bixby and uses it in their daily routine, you can use it to take a screenshot of any application you are using by voice commands.
In order to use Bixby assistant, press and hold the Home button, or use the wake-up phrase by saying “Hi Bixby”.
Once awakened, you will see the Bixby button that indicates that the personal assistant Bixby is listening to you. Now, you will need to say “Take a Screenshot” and it will tell you that it has captured It and you can check it out in the Gallery application.
Tips: Samsung’s Bixby assistant is powerful but sometimes disappointing. Its button is located below the volume button and is almost opposite the power button. On large phones like the Galaxy S9+ and Note 8, this often leads to accidental presses and unintentional Bixby launches, especially when the camera is turned on by pressing the power button twice. If you are tired of this feature, here is a tutorial on how to disable bixby on Samsung.
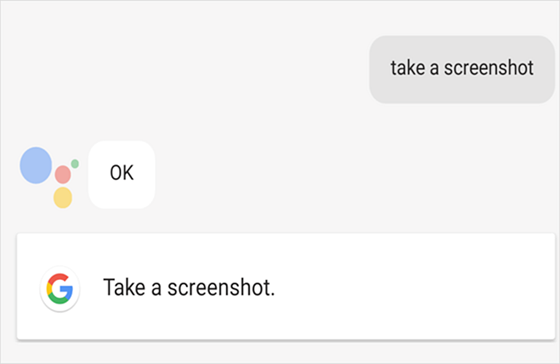
3. Use Google Assistant to take a Screenshot on Galaxy S9
If you are not a fan of Samsung’s Bixby, you can use Google Assistant as your tool to create a screenshot on Samsung Galaxy S9.
All you need to do is to wake up Google Assistant by saying the wake-up phrase “OK Google” and then say “Take a Screenshot” to command Google Assistant to do a screenshot instantly.
The alternative method to wake up Google Assistant is to tap and hold the Home button, and once awakened, you can say “take a screenshot” too let it do the work.
Moreover, you can ask Google Assistant to share the taken screenshot instantly by using the sharing Apps available on your mobile by saying “Share Screenshot”.
Part 6. How to Take a Screenshot on Samsung Galaxy S10
The latest mobile phone we are going to explain how to do a screenshot on it is Samsung Galaxy S10. Samsung hasn’t introduced any more features or additions to the methods of taking screenshots on Samsung Galaxy S10, they are all the same as introduced and explained on Samsung Galaxy S9.
If you have a Samsung Galaxy S10 mobile and want to know how to take a screenshot on it, all you have to do is to recap the previous paragraphs and you will learn how to make a screenshot on Samsung Galaxy S10, S10e and S10 Plus.
Conclusion
By reaching this line, you have now known every possible way to create a screenshot on Samsung Galaxy phones starting from Galaxy S7 to Samsung Galaxy S10 without having to download and install any third-party applications.
Don’t forget to share this article with your friends and family, as you must have someone who has one of these phones, and share your thoughts in the comments section below.
Part 7. Instantly Recover Deleted Data from Samsung S10/S9/S8
If you accidentally lost or deleted some important data, such as contacts, messages, photos, videos, etc while using your Samsung Galaxy S10, S9, S8, S7, or other Android phones, you must be very anxious and think about how you can get them back quickly. In this case, don’t panic! Here I recommend you a very powerful software, Gihosoft Free Android Data Recovery, no matter what reason your data is lost, no matter what type of data, you can use this software to restore them. In addition to recovering deleted data from Samsung mobile phones, this software can be used for data recovery of Huawei, HTC, LG, Motorola, Google Pixel, OnePlus and other mobile phones.
Related Articles
Recommended Software
- Android Data Recovery
-

- Easy-to-use data recovery tool for Android devices to recover lost files from Samsung, HTC, LG, Motorola etc.
- Windows Mac