Best YouTube Video Cutter – How To Clip A YouTube Video
You must have been in a need to cut out a certain part of a YouTube video. And, that might have been due to your need or desire to share with others a part or section of the video. So, have you ever wondered how to clip a YouTube video? If you do have such question in your mind, keep on reading this article to get answered.

It is worth noting that you don’t need to purchase costly video editing software so as to accomplish this task of video clipping. That’s because there are many free YouTube clip makers available out there for you to make use of. Below we have listed and explained three of them, which are very popular:
Method 1. Gihosoft Free Video Cutter
If the YouTube video has already been downloaded on your computer, then you can use Gihosoft Free Video Cutter to take a clip from a YouTube video with ease. As this is a lightweight and easy-to-use program specializing in video merging and cutting, even beginners can easily use it to select the cutting area and clip a YouTube video quickly while maintaining the original video quality.
To cut a YouTube video with this free YouTube video cutter, please follow the steps below:
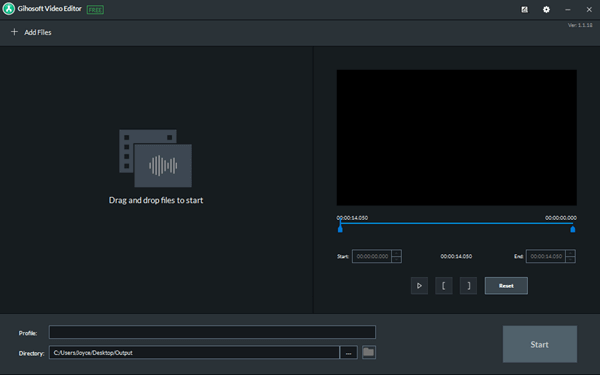
Step 1: Launch the video cutting software on your computer, and click the “Add files” button to import the downloaded YouTube video.
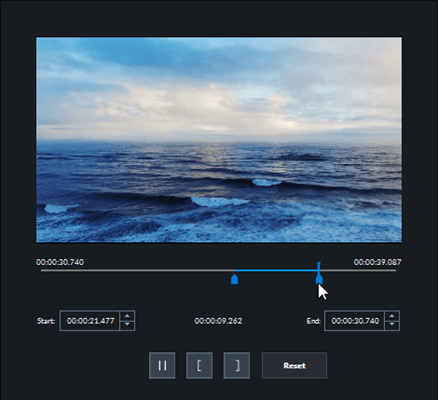
Step 2: Set the beginning and ending point of the video by moving the sliders.
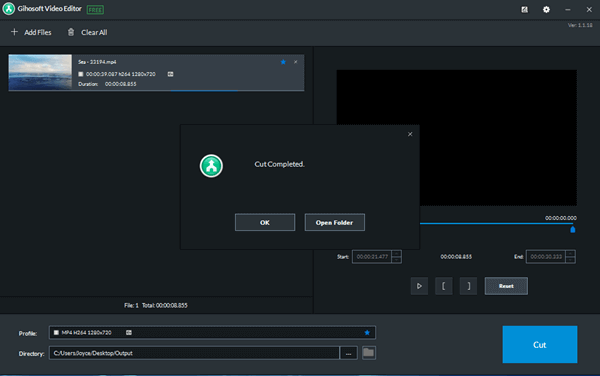
Step 3: Click the “Cut” button to start cutting the YouTube video. When it finishes, you can click on the “Open Output” button to play the clip.
Method 2. YT Cutter
With its simple and easy to use interface, YT Cutter is one of the best online tools for clipping YouTube videos. The process of cutting YouTube videos with the use of this YouTube clip maker includes the steps explained below:
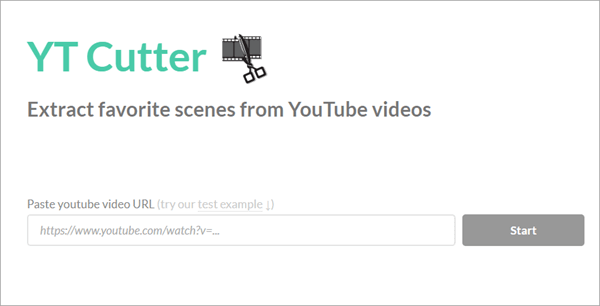
Step 1: Paste Video URL
First, go to https://ytcutter.com/ through your web browser. Once you are on the tool’s interface, you should paste the URL of the YouTube video that you want to cut in the provided box.
Step 2: Press the “Start” Button
Next, hit the “Start” button provided next to the box in which you entered your video’s URL. Or you can simply press the “Enter” key from your keyboard.
Step 3: Select Start & End Point
After that, this online tool will load the YouTube video. As the video plays, you can select the Start and End Point of your clip by pressing the “Start” and “End” buttons available on the left side. The part before the start point and the part after the End Point will be removed from the video.
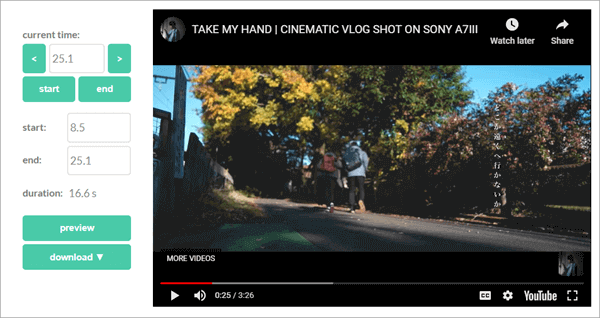
Note: There are also available increase (>) and decrease (<) buttons in the options provided on the left side of the loaded YouTube video. You can make use of these buttons for precisely increasing and decreasing the current time at which you have paused your video.
Step 4: Preview the Clip
Once you have successfully selected the desired Start and End Point in your YouTube video, just hit the “Preview” button, and then the tool will start playing the video clip that you have cut out of your YouTube video.
Step 5: Download the Clip
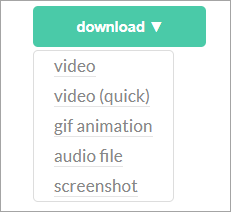
If you are happy with the preview of the created video clip, it is the time to download it by simply pressing the “Download” button. On pressing the button, it will show you 4 types of options to choose from: Video File, Audio File, GIF Animation, and Screenshot. You can choose any of these available options as per your requirement and choice.
If you select the option of the video file, it will download the file in MP4 format; if you select the audio file, it will download it in MP3 format; and if you select the GIF animation, the clip will be downloaded as a GIF image. On the other hand, if you go for a screenshot, it will simply create and download a screenshot of the start point of the video clip. And, that’s it!
Method 3. YouTube Video Cutter By Clideo
This is another online video trimming tool that you can start using through your web browser. It is very easy to use. The steps that you will need to follow in order to trim or clip your YouTube video with the use of this tool are explained below:
Step 1: Open the Tool and Paste the Video URL
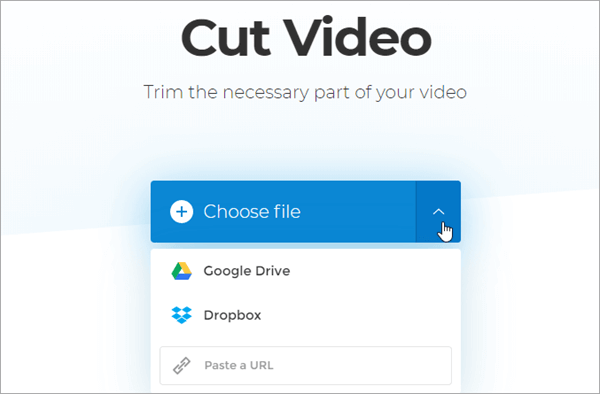
First, go to https://clideo.com/cut-video through your web browser. Once you are on the home page of the tool, place your cursor on the downside arrow symbol provided on the right side part of the “Choose file” button. Then you will see the third option “Pate a URL” and just paste the URL of your YouTube video into the provided box.
Step 2: Select the Start & End Time
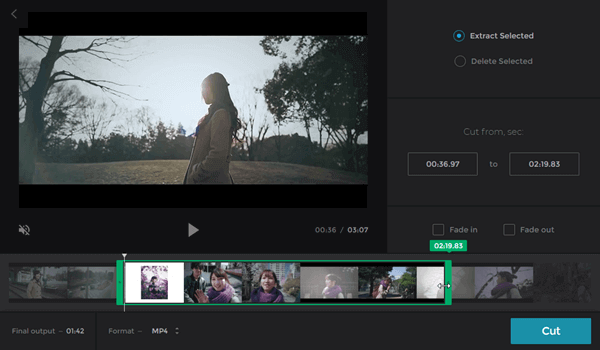
Once the video is successfully uploaded, you will be provided the tools that will be needed to clip or trim the uploaded video. And, here are two ways to select the Start & End Point of the clip:
- Way 1: There are provided green sliders over the timeline available below the video. You can move and reposition the sliders in order to define the start and end time of your video clip.
- Way 2: You can also simply enter the required start & end time in the boxes provided on the right-hand side of the displayed video.
Step 3: Add Transition Effect and Preview
Once you have selected the Start and End Point of your video clip, you can also add a transition effect to the beginning & end of your video clip. For this, the “fade-in” and “fade-out” options are provided by the tool. Then you can preview the clip by pressing the play button.
Step 4: Select Output Format and Start Trimming
If you are happy with the preview, you should select the desired output format of the clip and then click on the “Cut” button. After that, the trimming process will start and it will finally end up with the desired video clip. And, it is done!

Final Words
There are many situations in which you may get into a need of cutting out a section of a YouTube video. Some of such situations include cutting out the intro part of a video, highlighting an important moment in a video, etc. In such a situation, you can confidently go-ahead to use the YouTube clip makers like the ones mentioned above.
