How to Remove Unwanted Objects from Pictures Without Photoshop
Let me know if this sounds familiar: You go to a place of interest, take nice pictures for memory, then go home happily. At home, you take out your smartphones to enjoy the photos, only to find that your photos are ruined by wandering tourists or warning signs.
Even a tiny flaw can damage your entire picture, let alone a people or a street sign. Instead of worrying about getting the perfect pictures spoiled every single time, you can use Gihosoft Photo Eraser to remove all the unwanted parts of a picture and make them vanish as they were never there before.
Gihosoft Photo Eraser is a software designed for those who are not good at Photoshop, as we know, Photoshop is quite expensive and not user-friendly for non-professionals. Now without Gihosoft Photo Eraser, even a novice can take every undesired item from a picture without any hassle. Now, let’s cut the crap and see how to do the erasing job with Gihosoft tool.
Quick Navigation of Gihosoft Photo Eraser
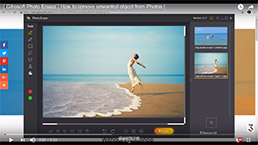
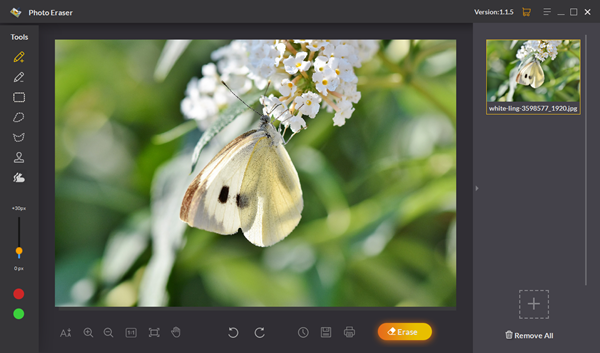
The screenshot below is the main interface of Gihosoft Photo Eraser. As we can see, the left side is the Tools section, in this section, you can find all the widgets you need to erase, retouch & restore a picture. Now I will walk you through the features of all the widgets in detail.
- Selection Brush
- Simply mark the unwanted object by painting over it, the marker size can be changed from 1px to 200px by pulling the slider up and down.
- Fix the Selection
- Erase the imperfect parts that have been painted by simply moving your mouse.
- Rectangle Selection
- Rectangle Selection uses a rectangle to cover the unwanted part that you want to say goodbye to.
- Lasso Selection
- The Lasso tool is to draw a circle or a few lines connected freehand around the object which you’d like to erase.
- Polygon Selection
- A bit like Lasso tool, Polygon Selection is to draw a polygon around the object which you want it to disappear. This tool begins by clicking somewhere along the edge of the object or area you need to select, then releases your mouse button. Click again to add a second point, then releases your mouse button. Continue this process until you connect the last point to the initial point.
- Sampling Stamp Tool
- This tool allows you to copy one area of an image onto another area of an image to replace them. It is common to use it to retouch blemishes on people's faces but can be useful for any subject and any graphic.
- Smart Clone Tool
- Duplicate the sampled area of an image to the selected area.
- Guide Line: How to Remove Unwanted Objects from Pictures
- Now you’ve probably know the basic features of Gihosoft Photo Eraser, let’s come to new step: how to use it to erase anything you don’t like on a photo.
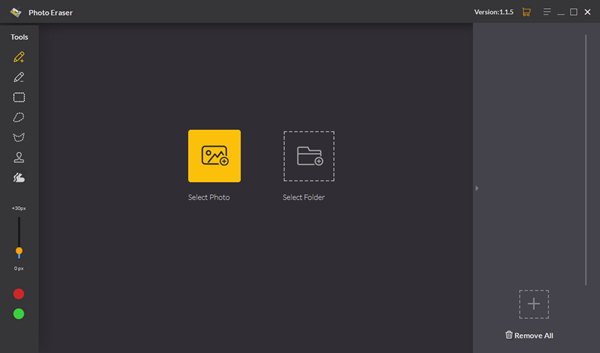
Step 1: Import a single photo or a folder
Load a picture that has blemishes or some imperfections, you can also load a folder which has several pictures. The operation is quite easy, simply click the “Select Photo” or the “Select Folder” button.
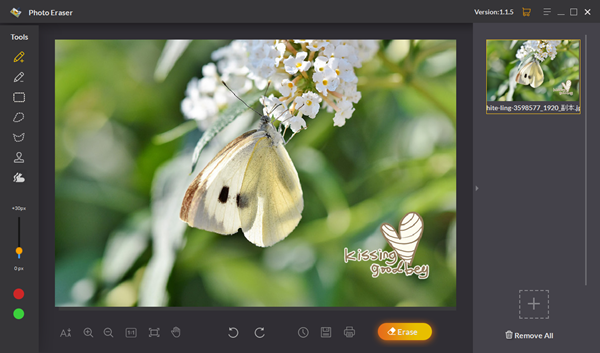
Step 2: Select the problem area to be corrected
When the picture is loaded, you can zoom in it to highlight the problem area. Then simply drag the marker over the object inch by inch, not need to fiddle with great precision, the software will use algorithm to fix it automatically.
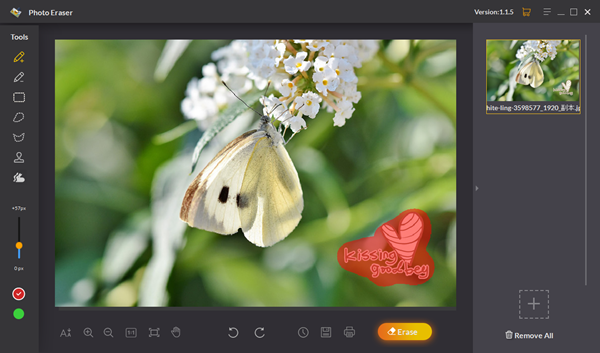
Step 3: Save the picture as a new one
Click the “Erase” button and the unwanted object will vanish before your eyes.
- Tips:
- 1. It’s recommended to remove objects one by one. If you select several stuffs at once, although they will be removed all together and save your time, the final result will not be that good. Try to erase objects one by one, and you will get wonderful works.
- 2. Each erasing procedure is unique, so you'll get a slightly different result each time you apply the "Erase" button.
- 3. Note that the object will not be erased perfectly just one time, sometimes you need to do it several times.